Creating Your First Java Application With IntelliJ IDEA
Creating a Java application is easy using the IntelliJ IDEA IDE tool.

Table of Contents
In this article, we will create, run, and package a simple Java application that prints "Hello, world!" to the system output.
Getting started with IntelliJ IDEA
We will use IntelliJ IDEA IDE for creating our first Java application. We will also see IntelliJ IDEA features for boosting your productivity, for example, coding assistance and supplementary tools.
Install the IntelliJ IDEA community/ultimate version, both support the features we're talking about.
How to create a new project?
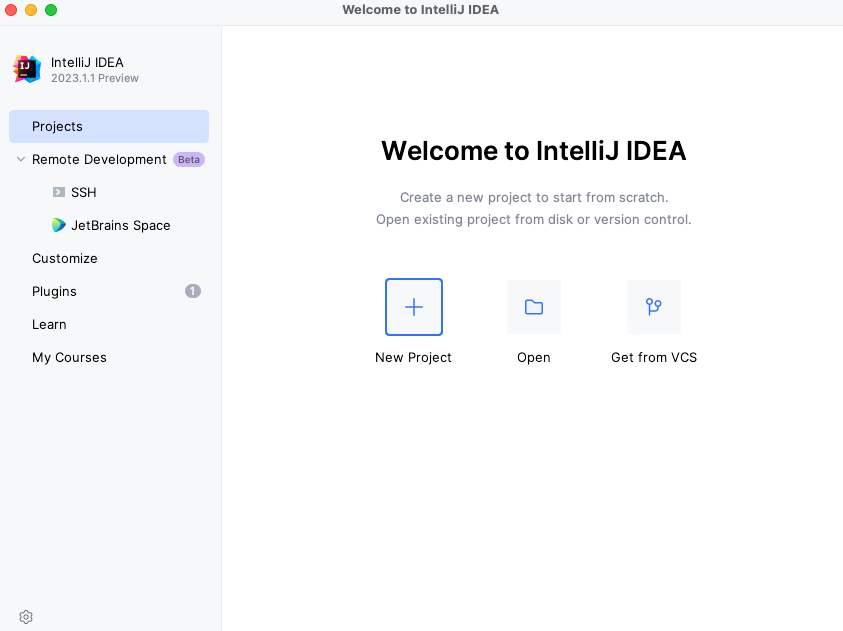
Click on "New Project" on the IntelliJ IDEA as shown below.
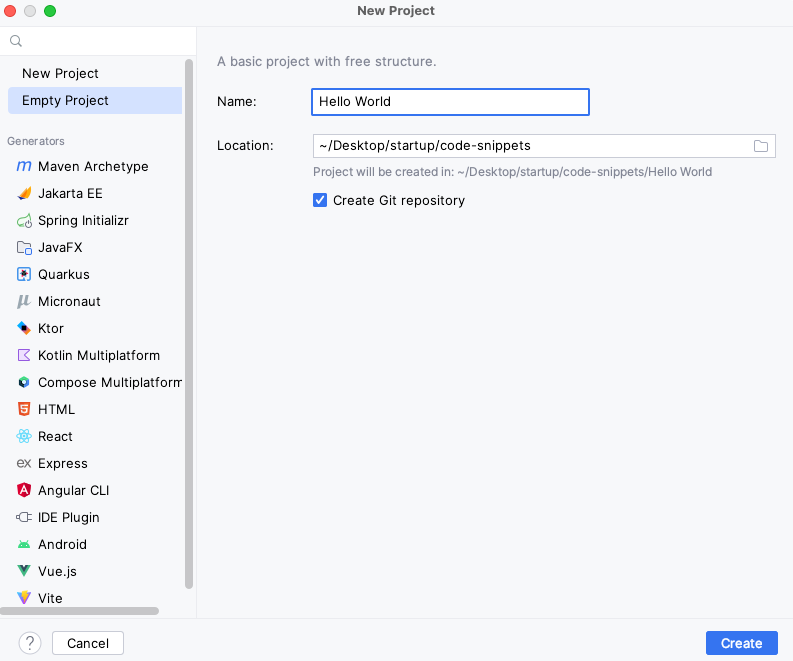
Select "Empty Project" from the left sidebar. On the right screen, choose a name for your project, I chose "Hello World" and chose a location. Once finished, click on the "Create" button to create the project.
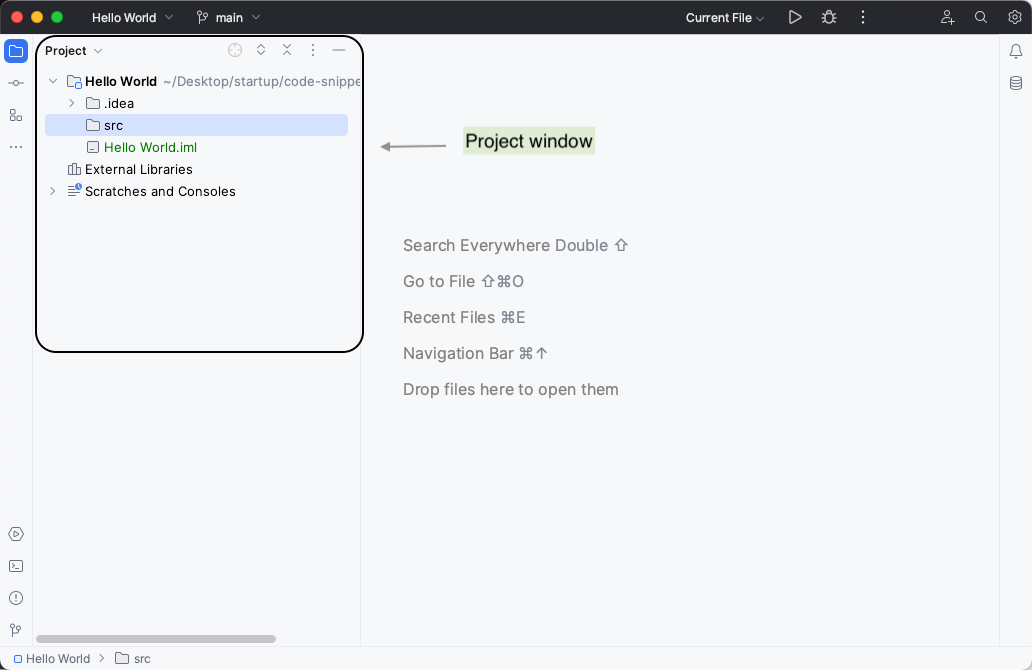
After the project is created, you see an IntelliJ IDEA project window as follows. The left bar is the project window that shows us all the directories and files that make up our project. You can use the mouse or arrow keys to navigate around the project window.
How to create your first Java class
Let us create our first class for our example application. Package (packages) are used to group together classes that belong to the same category or provide similar functionality, and are useful for organizing large applications with hundreds of classes.
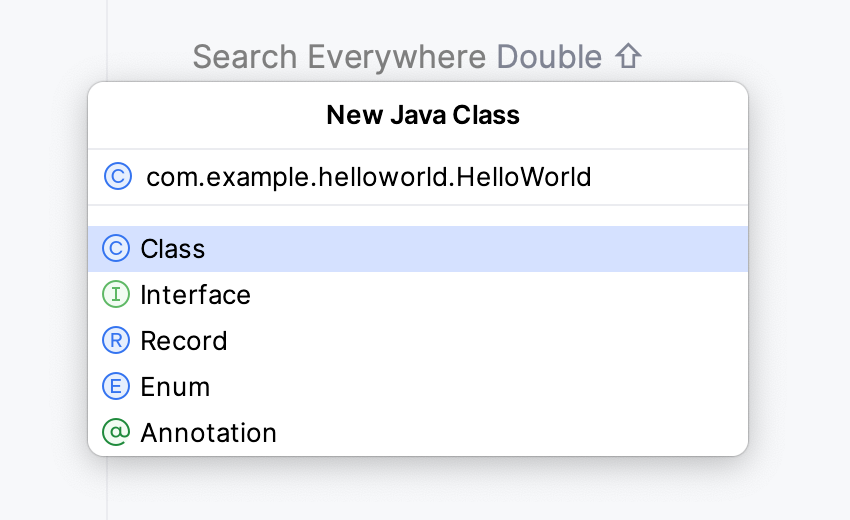
To create a new class, press Cmd + N on macOS or Alt+Insert on Windows or Linux on the src directory, and select "Java class".
But if we want to create a new class in a particular package, we can type the whole package path, separated by dots, followed by the class name.
IntelliJ IDEA can create a number of different types of class files, such as Interface, Record, Enum, and Annotation.
We see that IntelliJ IDEA created the package we wanted under the correct directory structure.
Type main inside the class, and IntelliJ IDEA suggests a method, press the key enter to generate the code for us with the correct parameters.

After the code is generated, you will see something like this.
package src.com.example.helloworld;

public class HelloWorld {
    public static void main(String[] args) {

    }
}
Inside the main method press Cmd+j or Ctrl+j in Windows to see the list of live templates that are valid for the current context.
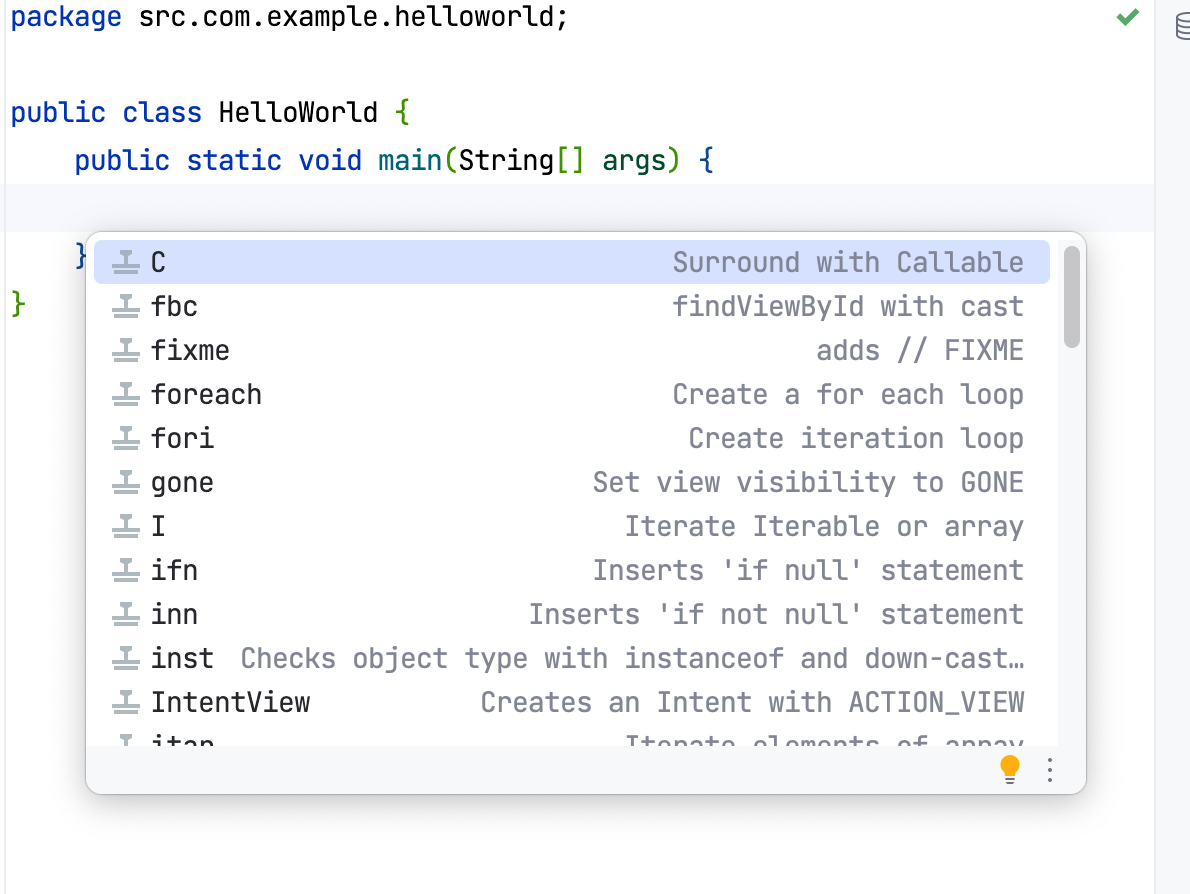
Let's call a method to print something on the console.
If we type Sy, we see a dropdown of likely classes we might want to call. We want, the first one, and it's already highlighted.

If we press the dot next to System, IntelliJ IDEA will bring up the next suggestion. Typing o will list accessible fields and methods in the System class that begins with o, out is the one we want to insert another dot again and code completion shows the most likely methods.

choose println() and press enter to select it.
There are a number of println methods, and they all take different types of parameters. IntelliJ Idea shows the different parameter types available to us, which can be useful.
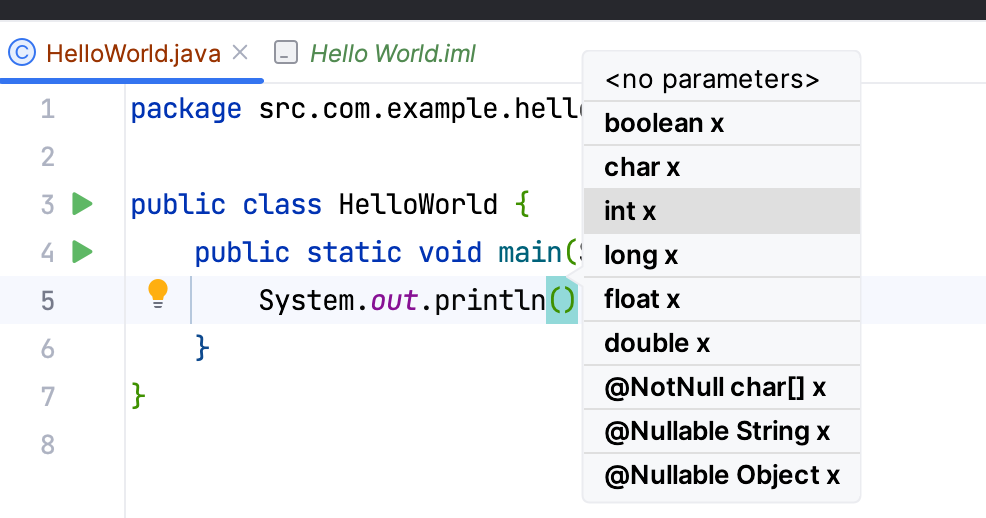
Type a double quote, we should notice several things; first, the editor automatically inserts a closing quote. Second, it highlights the String parameter for our method, so we can see this is a valid type for the method.
Use escape to hide the pop-up.
Now, let's type Hello, world!.
package src.com.example.helloworld;

public class HelloWorld {
    public static void main(String[] args) {
        System.out.println("Hello, world!");
    }
}
If this is your first time programming in Java, congratulations! You've just created your first Java application.
How to run a Java application on IntelliJ IDEA?
Java files like this one can be compiled into bytecode and run. IntelliJ IDEA can do all of this for you.
We can run classes with a main method either from the green run icon at the class level or from the run icon in the gutter next to the main method itself.
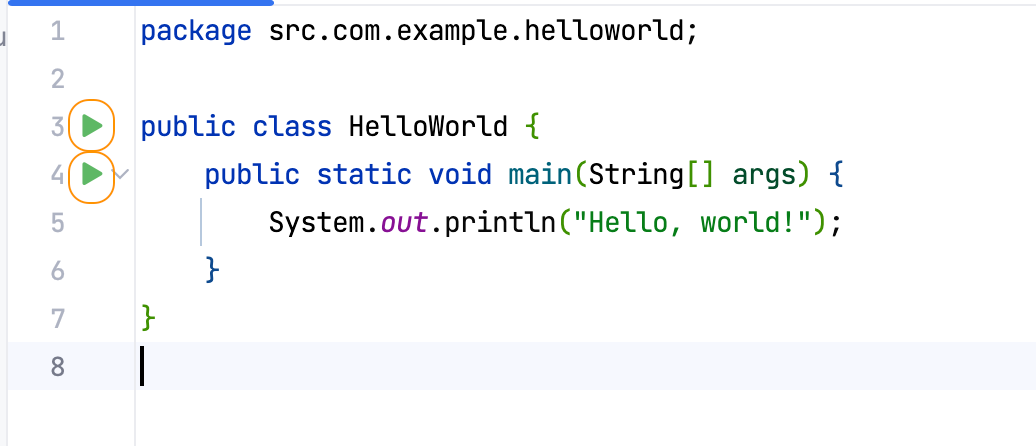
We can see there's more than one way to run an application, for example, we could debug it. But for this lesson, we're going to run it in the simplest way.
Hit the green icon to run the application. IntelliJ IDEA compiles the file into a class file, then runs it and shows the output in the Run window at the bottom.
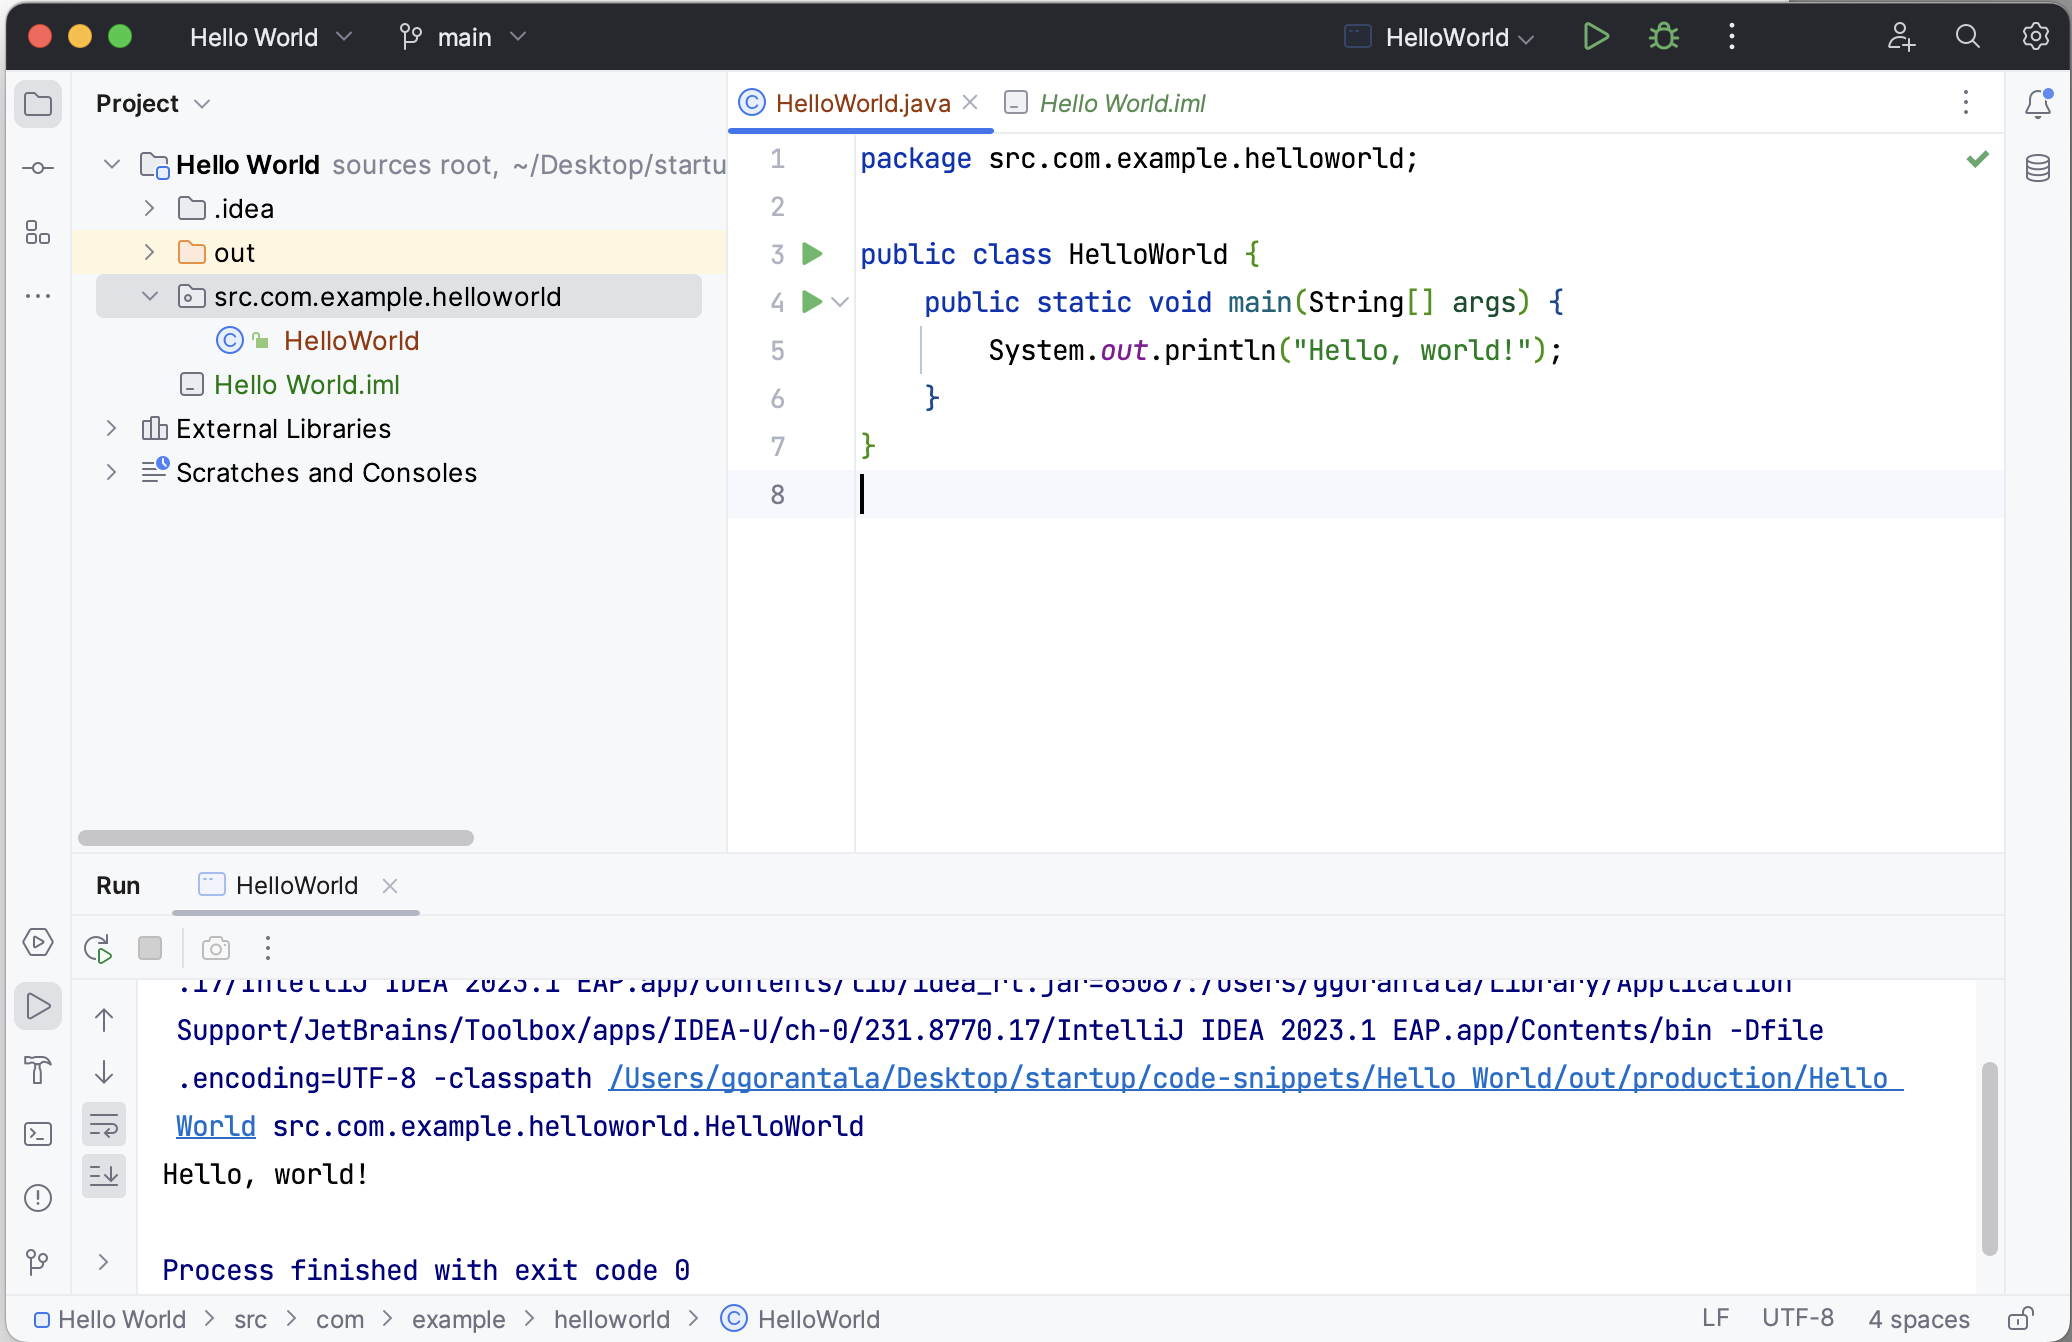
The second line in this output of our program is "Hello, world!".
IntelliJ IDEA compiled the HelloWorld.java file into a class file.
Sketch of files and folders
By default, the IDE creates a folder called out/production as shown below sketch.
HelloWorld
|
+--- .idea
|
+--- out
|    |
|    +--- production
|          |
|          +--- HelloWorld
|		   |
|          +--- src.com.example.helloworld
|                |
|                +--- HelloWorld.class
|
+--- src.com.example.helloworld
     |
     +--- HelloWorld.java
This sketch completes our first Java program.
Gopi Gorantala Newsletter
Join the newsletter to receive the latest updates in your inbox.


